Showing posts with label How to. Show all posts

Thursday, January 22, 2015

Adding Character to a Laundry Room

My wonderful friend Grace from Singapore and I have been messaging about her cute new little abode lately, and she is having a hard time with her bland laundry room. I started giving her some ideas and then decided visuals are always the most helpful. For some inspiration, I put together a little guide to adding character to a little laundry room:

To start, you are the one stuck in your laundry room doing a chore, why not make it cheery and fun!

1. Quirky Lighting - This is a great place to play with affordable, yet fun lighting. IKEA is great for this: KNAPPA Pendant Lamp $25 | JONOSFAR Pendant Lamp $15

2. Funky Storage Pieces - Needed for your laundry supplies, sorting laundry and dry cleaning. These metal baskets from H&M home are fabulous. $20

3. Paint or Temp Wallpaper - Add some color or patterns to your room! Why not, it should be a space to play with fun colors and mix it up. I'm definitely considering doing some fun temp paper in ours and Etsy is a great place to find it: AccentuWall Blue Chevron Lines $35/strip

4. Fun Laundry Baskets - I love the graphic black and white stripe of this H&M laundry basket. Plus, I like that it seems easy to carry around when picking up laundry. $15

5. Vibrant Rug - Rugs are a perfect way to add a pop of color to your laundry room. This colorful rug from Urban Outfitters will do just the trick! $19-44

Everything above is a great price (with the exception of that fab navy washer & dryer set!), so giving your laundry room a little character can happen for under $200. I'm thinking about getting some of these pieces for ours! I think you could make this transformation in a morning if you start with a good Starbucks.

Lots of Love,

Tuesday, December 2, 2014

How To: Tissue Paper Tree Skirt


On Thanksgiving, I asked my grandma if she was good at making tree skirts. I had been looking and it is crazy how much tree skirts cost - even the cute ones at Target are $30-40. I know that's not terrible, but it's still expensive for something you cover with pretty presents! Plus, finding one that fits the look you want is not easy. Well, I was very surprised when my grandma said that she used to make her skirts out of tissue paper. Tissue Paper!? She started telling me about it and I loved the simplicity of it. She said when her children were younger, she would have a real tree flocked and then with her friend, pleat tissue paper for the tree skirt. I decided to give it a whirl.

That weekend, she put together an example for me to make sure I understood how to pleat it - so cute of her. I loved the idea of making something like she used to - she was quite the home maker back in the day! Plus, I decided to use my childhood glass ornaments, vintage ornaments and red balls on the tree this year, so I loved the idea of a vintage style skirt. Turns out, it's pretty easy! Tree skirt for $3...I'll take it!


Here are some more pictures of the tree this year - I went for a traditional look, with pops of color (the big globe lights!). I hope you like it - I'm sure my husband appreciates that the super girly ornaments from last year were left off. Side note - taking pictures of trees is beyond difficult, so sorry the pictures aren't the best.


Photos via me
My  mom gave me the Christopher Radko ornaments we had growing up and I was so excited to put them on the tree - they have such amazing detail and are so fun! Above are some of my favorites from our collection. If you are local and interested in Radko ornaments, The Plaid Giraffe has some fabulous ones. To go with these ornaments, I searched on Ebay and found some vintage Radko Shiny Brite Ornaments - $20 for a set of 16!


Ebay is a great place to search for vintage Shiny Brite ornaments if you are interested in finding some for yourself. Hope your Christmas decorating is going well! We still have a little more to get done, but we are getting there. Love this time of year!

Lots of Love,

Monday, October 27, 2014

Pretty Paper Pumpkins

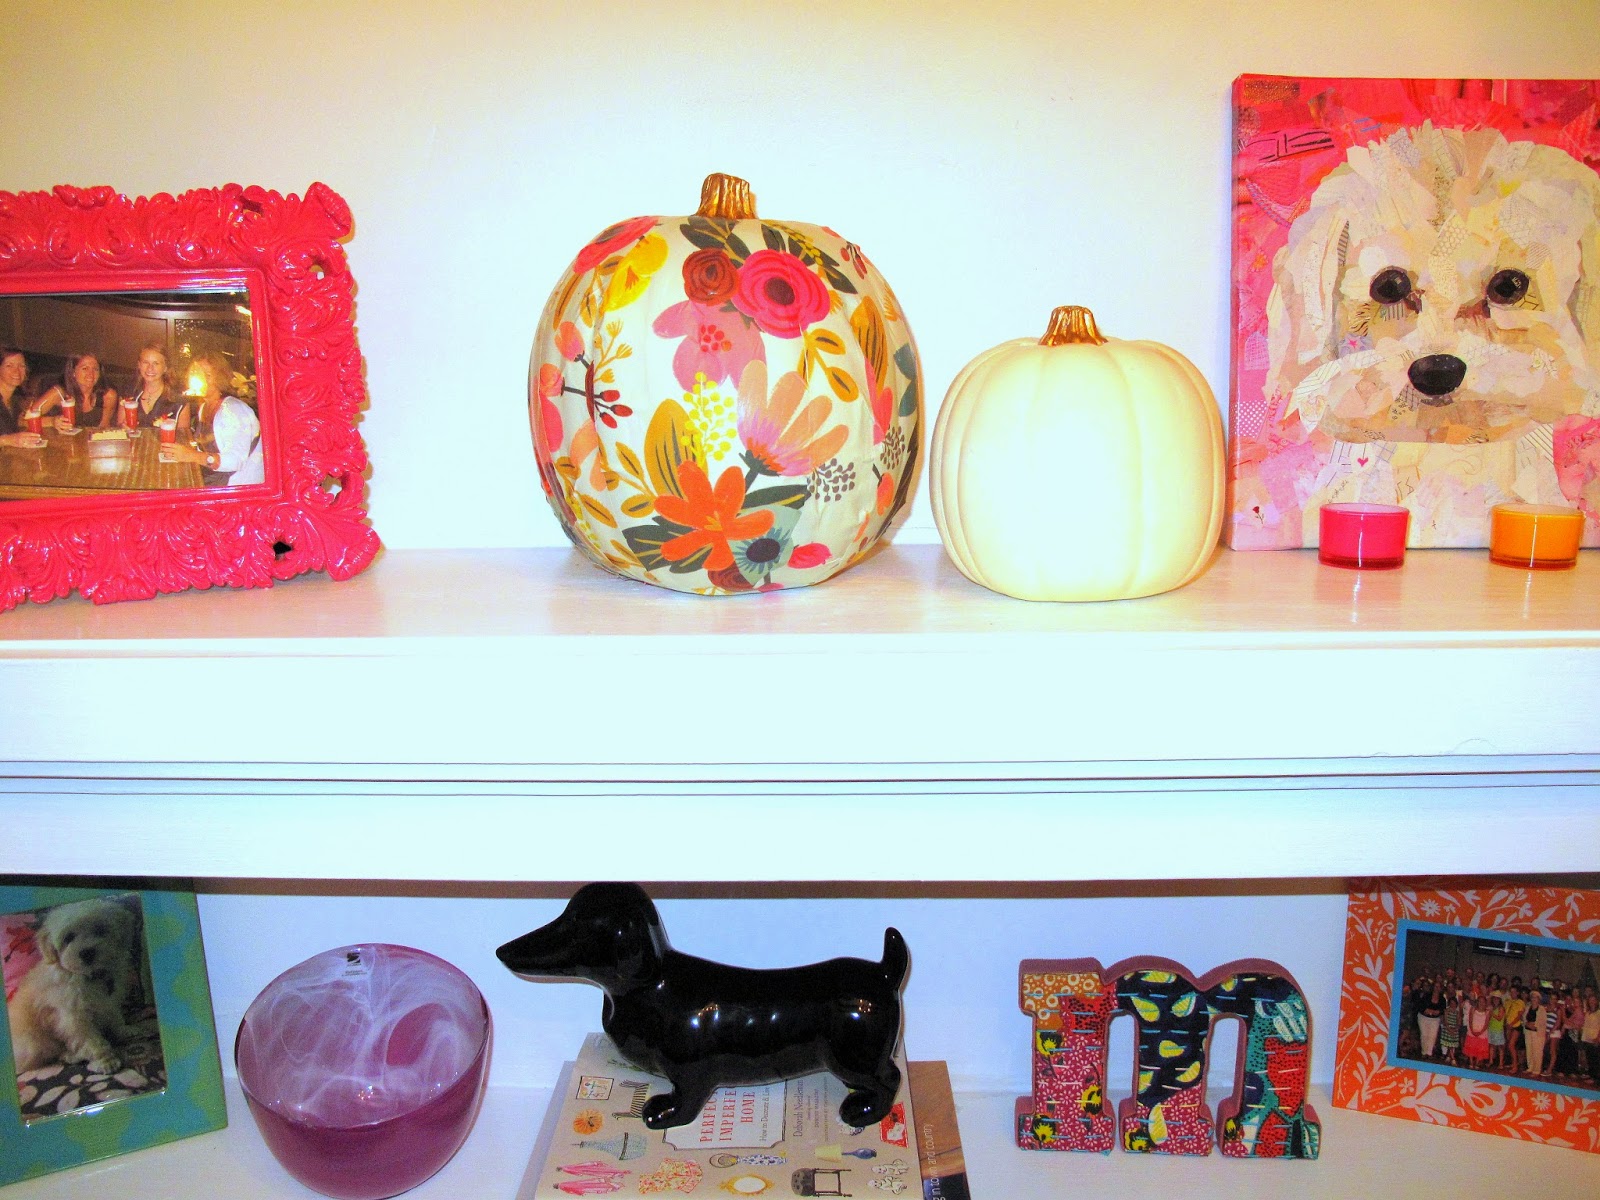
My Aunt Mary and I found this idea of covering a pumpkin with paper and we decided it was a must try! She and I learned things along the way about the process, so I decided to share, plus our pumpkins have turned out adorable! Here is the one I did:

Went well with my October in the Botanical Rifle Paper Co. Calendar
I worked on it last night and it definitely takes some patience, but I think any level can conquer it.

Time: 
30 minutes - 1 hour (depends on pumpkin size)

Materials:
Faux pumpkins - I preferred white
Gold Leaf Paint
Paint Brush
Sheet of Pretty Paper
Sponge Brush
Mod Podge Matte
Scissors

Directions (in pictures because I think that makes it more fun!):

Directions & Photos via me
Painting the stems with gold leaf paint was a great way to glam up the pumpkins. I liked it so much, I kept the smaller pumpkin white. I loved the mix of pattern and plain. Like I said earlier, this project takes some patience. Patterns won't line up perfectly and you might have some bumps - get over it. It's not going to be perfect, but a busy patter definitely helps distract!

Rifle Paper Co. paper is my Aunt Mary's and my favorite for this project because they are busy and bright. The paper I purchased is from Paper Source and on the Rifle Paper Co. website they have other fun options. You can also check out my post from last month about favorite places to find fun paper.


Photos via me
Now go make some pretty pumpkins! And yes, I recommend faux - you'll want to set them out every year!

Lots of Love,

Sunday, October 12, 2014

Start the Spooks!

I don't know about you, but I'm starting to feel the itch for Halloween! It might be the fact that we got some pumpkins or the fact that my husband is dying to put out our decorations...I told him to wait one more week...but Halloween is coming up and we have to get ready! This weekend I worked on the invitations to our annual Halloween party. My aunt recently showed me how to use embossing powder, so I decided to be creative and make homemade invitations. They are simple, but I love that about them. To show them off to you, I put together a little scene using the fun (and cheap!) decorations I scored in the Dollar Spot section of Target and from Dollar Tree.


The invitation is printed on paper (A6 Persimmon) from Paper Source. I also got black envelopes (A6) to go with them and used a white pen to write the addresses. I think they turned out fun and I'm excited to mail them out this week! Sorry for the spoil before you receive them - I was too excited.


My favorite find is the shiny pumpkin - they are battery operated and light up. I was also excited about the battery operated tea lights because they are safer to use in your outdoor pumpkins - plus the Kansas winds won't blow them out! The spider web runner will be fun to put on tables and the glitter spiders are fun to have crawling all over. The witch hat was a DIY tonight:

Photos via me
I found the hat form while wondering around Michael's tonight. They seemed like a fun table decoration, so I decided to buy a few to try different decorating ideas. Close by was glitter washi tape on sale for 99 cents! I thought it could make a fun, sparkly hat and I think it turned out to be just that! It took one episode of Scandal to make it, so just get your materials, sit down to your favorite show and start covering the hat form with strips of washi tape. I did one round all the way around then kept layering the tape on. You can also make fun patterns by going diagonal, straight across or cut the tape into small pieces. I'll keep you all posted on what I decide to do with the other two hats!

Lots of Love,


Monday, September 15, 2014

How To: Paper Art

Believe it or not, I still have projects from Florida to share! Seriously, we did so much while I was down there. This one is a simple craft project I helped my cousin Emily with. She wanted a cheap way to add some color to her apartment walls, so she asked me to help her with covering canvases with fun paper that worked with her furniture. It is seriously an easy project (if your stapler is nice to you!).


Materials:

  • Canvas (however many you want & the size you want - we did 12x12)
  • Fancy Paper (suggestions for my favorite places are below)
  • Stapler & Staples - standard
The most expensive part of the project is most likely your sheets of fun paper, but those are only around $5.00 usually! For canvases, check out Michaels for their bulk packs, plus they usually have good coupons. 

How To:
  • Cut your paper down to the size of your canvas, but leave enough room to wrap around the edges.
  • Fold in the edges like you are wrapping a present - look at the corners below.
  • Open up your stapler, so you can press it into the paper - make sure you press down really hard and avoid the canvas staples.


That's seriously it! So easy and I think they turned out cute:


I like mixing busy patterns with simple patterns - having the florals with the chevron & polka dots. Since my wonderful Aunt Mary is a paper hoarder (in the best possible way), the cost of this project was around $10 for the canvases. How cheap is that! If you want a more formal look, you can also frame your pretty paper like I did in our office.

Paper is from Paper Source - here is a similar print.

My favorite spots for gorgeous paper are as follows:

1. World Market | 2. Paper Source | 3. Paper Mojo | 4. Rifle Paper Co.
If you have a blank wall or some paper that you are loving, this is a great way to show it off. Get to it!

Lots of Love,

Saturday, August 23, 2014

How To: DIY Diamond Pinatas!


The Megan Bachelorette Party series continues with a how to on DIY pinatas! I found some great already made options to purchase, but I figured I could do them cheaper by some good ole' fashioned DIY. (Don't worry, I'll show you the purchase options at the end if you aren't in the mood to DIY!)

I searched on Pinterest for a good DIY diamond pinata idea and bam! found one:

They have great pictures and follow along instructions, so I am directing you that way. My quick instructions and modifications are as follows:
  1. I used a cardboard box I had laying around and measured out triangles - make sure your sides are equal.
  2. Instead of 8 triangles, I made the pinatas using 6 - 3 on top, 3 on bottom. I didn't have a ton of time, so I decided the smaller size would be quicker.
  3. I used a small X-ACTO knife to cut out the triangles. It is hard, but try to go slow and steady. I had some wavy sides and it made them harder to match up later.
  4. On one of the triangles, cut out a little door to put your goodies inside once you are done.
  5. Tape the edges of your triangles together. I used a masking tape - I only had green, but if you can find something that matches the color of your tissue, that would be better.
  6. Pull a thick string through the top of the pinata.
  7. Fringe your tissue - the website above has great direction for this so you can move quickly.
  8. Attach the fringe by using Mod Podge a section at a time. Cover that thing! Make sure you keep layering in mind. Let it dry.
  9. Viola! Fill them with confetti, candy and if it's an adult party, liquor shooters!


Little door, so you can stuff your pinata full of goodies! I used chocolate coins, confetti and shooters!
Hung up at the party!
Get it girl!
Like I said above, if you aren't in the mood to DIY (and you want more perfection), here are my favorite affordable ready made diamond pinatas:


Such a fun decoration, plus it adds some excitement to the party! Smack that!

Lots of Love,

Saturday, July 26, 2014

How to: Clean a Chalkboard Wall


End of last year we put a wonderful chalkboard wall in our office. Recently I tried to clean it and did a BIG NO NO - tried cleaning it with water. I know it seems like a reasonable idea, but ugh, it ruined my wall. I didn't know what to do, so I started searching online. I put some tips together and really liked the idea of cleaning it with vinegar. I really wish I would have done this in the first place because I have some water spots that are still peaking through. That's why I am sharing - to stop you from spotting up your beautiful black chalkboard wall!

You can barely see what I wrote because our wall was such a mess!
First, you need to wipe whatever you have drawn on your board off with an eraser - I like to use the Mr. Clean magic erasers.
Second, try to wipe off the excess chalk dust with a dry cloth.
Final step, fill a bucket or bowl with warm water. Then mix in a 1/2 cup of vinegar. Soak a cloth in the mix and make sure to ring it out. Next with a flat side of the cloth, wipe sections of your board in horizontal strokes. Viola! Should look better.
Most important thing to remember, DO NOT CLEAN YOUR CHALKBOARD WITH WATER! I love character, but not the hot mess kind! I want my board to be ready for new creations. You don't have to do this all the time, just on occasion. I use my magic eraser on a regular basis and it works fine.
Lots of Love,