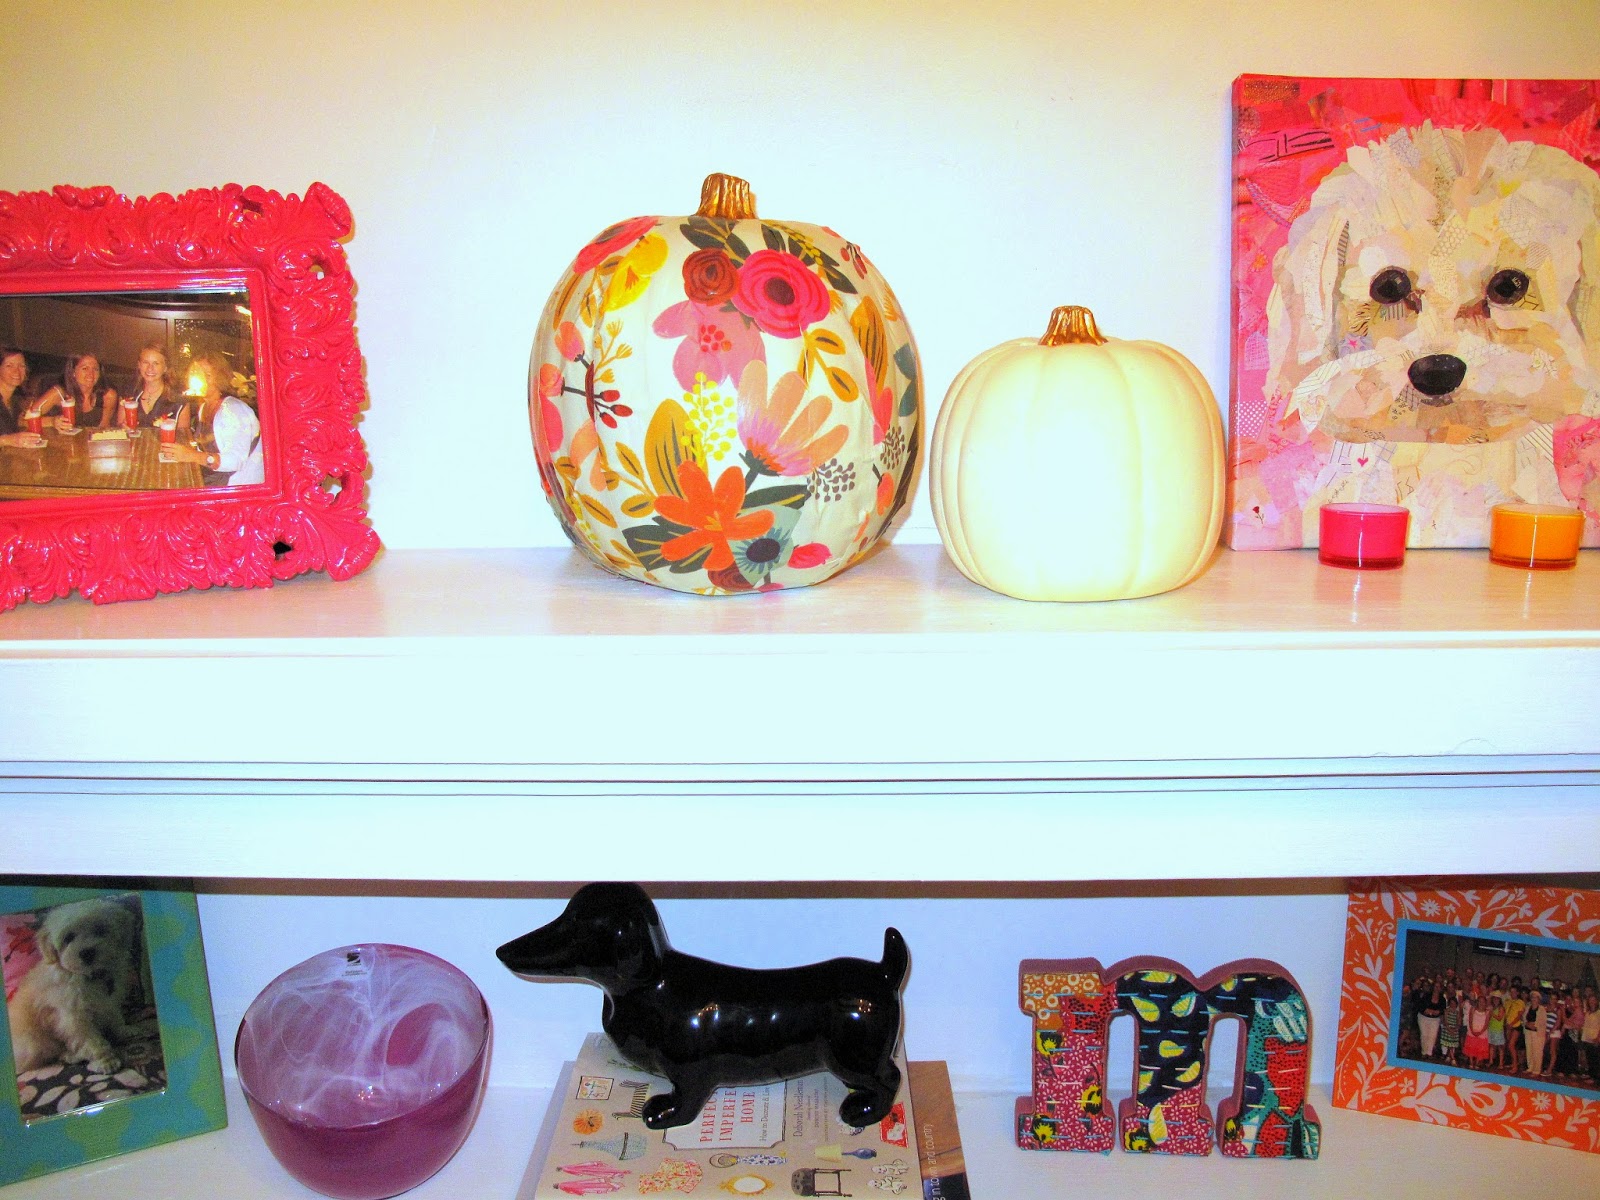
My Aunt Mary and I found this idea of covering a pumpkin with paper and we decided it was a must try! She and I learned things along the way about the process, so I decided to share, plus our pumpkins have turned out adorable! Here is the one I did:
I worked on it last night and it definitely takes some patience, but I think any level can conquer it.
Time:
30 minutes - 1 hour (depends on pumpkin size)
Materials:
Faux pumpkins - I preferred white
Gold Leaf Paint
Paint Brush
Sheet of Pretty Paper
Sponge Brush
Mod Podge Matte
Scissors
Directions (in pictures because I think that makes it more fun!):
 |
| Directions & Photos via me |
Painting the stems with gold leaf paint was a great way to glam up the pumpkins. I liked it so much, I kept the smaller pumpkin white. I loved the mix of pattern and plain. Like I said earlier, this project takes some patience. Patterns won't line up perfectly and you might have some bumps - get over it. It's not going to be perfect, but a busy patter definitely helps distract!
Rifle Paper Co. paper is my Aunt Mary's and my favorite for this project because they are busy and bright. The paper I purchased is from
Paper Source and on the
Rifle Paper Co. website they have other fun options. You can also check out my post from last month about
favorite places to find fun paper.
 |
| Photos via me |
Now go make some pretty pumpkins! And yes, I recommend faux - you'll want to set them out every year!
Lots of Love,


No comments:
Post a Comment
I love hearing your thoughts & ideas!