Thursday, January 30, 2014

Sparkling Champagne!

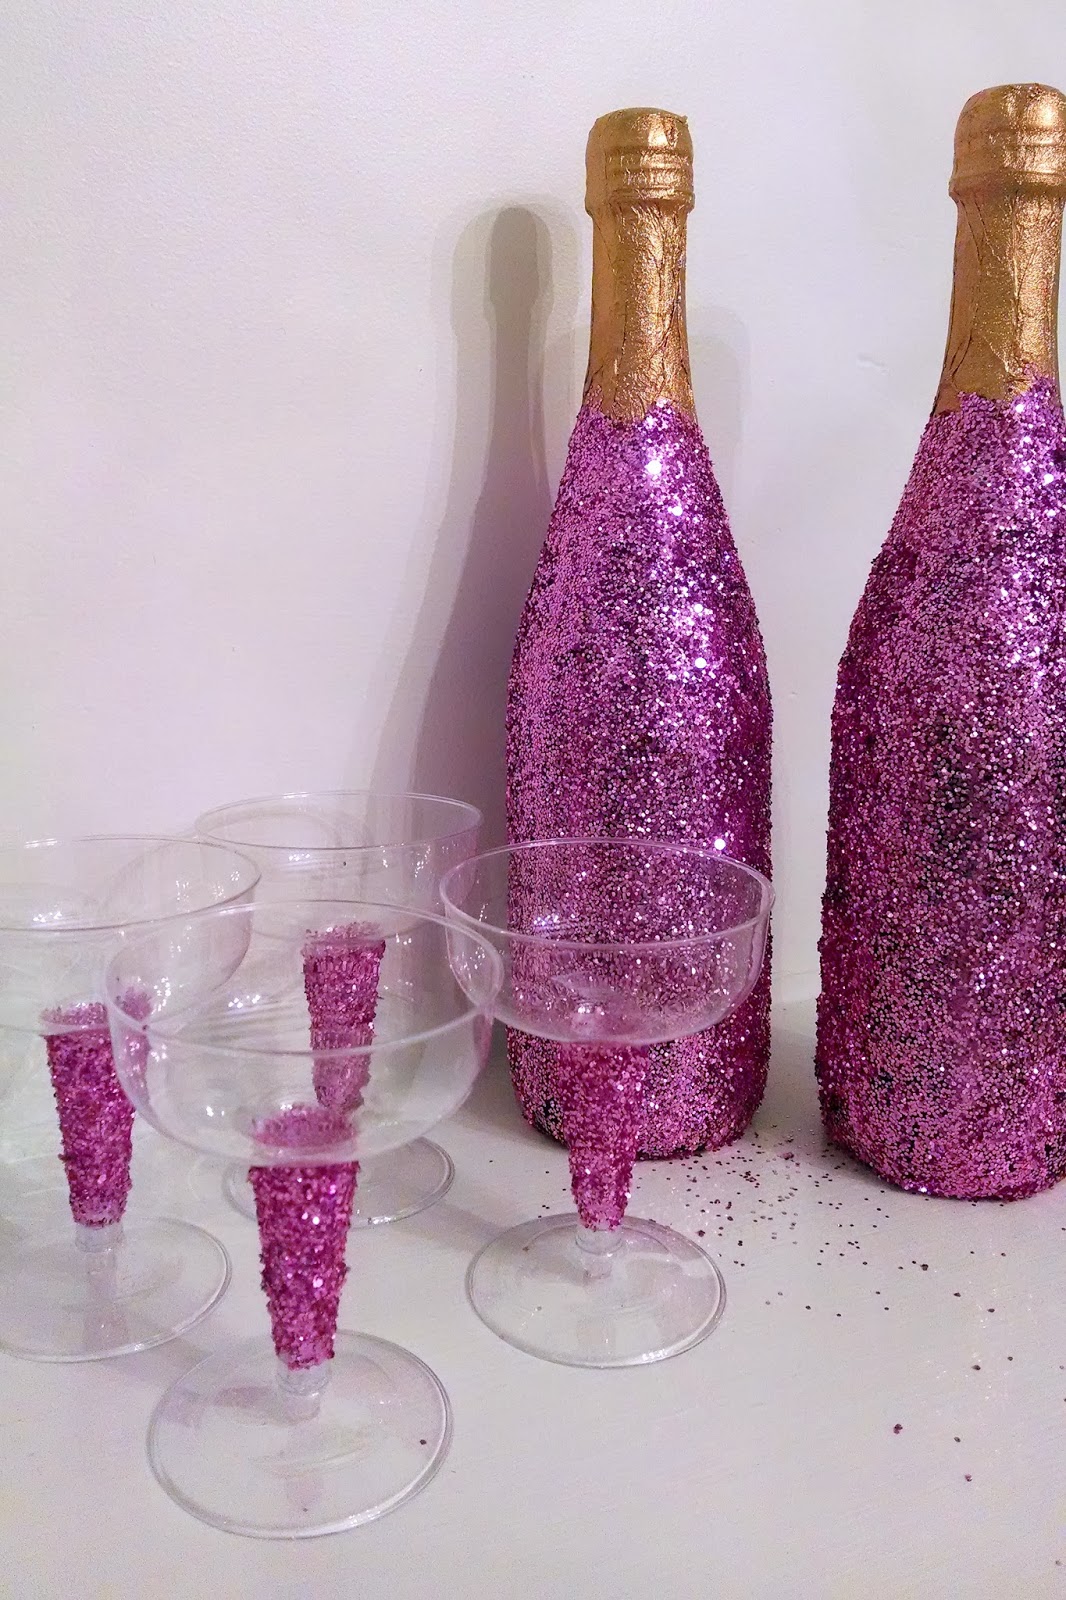
Sneak peek to the Valentine's Party: Glittering the champagne bottles and glasses!
I've snazzed up some champagne bottles before, for the NYE Party at my friend Rachel's house. This time around I decided to use glitter. Glittered champagne is all over Pinterest and I thought it would be a perfect look for a girly Valentine night with my coworkers.

Materials:
Cheap champagne (you are covering the label anyways, they'll never know - except my friends now...)
Favorite color of glitter (or multiple if you are feeling ambitious)
Mod Podge
Sponge Brush
Bowl

Directions:
This is a great 10 minute craft because all you have to do is cover the bottle with Mod Podge and then shake the glitter on...it's seriously that simple!


Photos via me

These are great for some girly character! I foresee myself making these again for other girl night parties because they turned out so cute. I need to think of what other materials to glue onto the bottles...any ideas? Please comment!

Lots of Love,

Monday, January 27, 2014

How To: Baby Mobiles

Yesterday in my post about Anne's Baby Shower, I said I would write about the baby mobile I made. If you have an afternoon to waste and some patience, baby mobiles can be a fun project. I have made two over the past couple years and they were both different ideas. The common materials for a baby mobile are wooden embroidery hoops that you can find at most craft stores. I painted mine to match the accessories on the mobile. You will also need a good string to hang your items from the hoops, as well as some ribbon to tie the hoops together and to hang the mobile. Then you have to decide what you want hanging from the mobile. Here are the two I have done, I will walk through them individually:

1. Bird Mobile for Baby Addie - Her nursery is classic and girly and I wanted to make something special for her. I loved a mobile I saw somewhere with pretty cloth birds hanging from it, as well as hearts hanging from the center. I found a pack of quilt fabric to use to sew the birds (it was a great find because with quilt packs the fabric coordinate). I cut out a simple bird shape with the fabric folded. I then cut out some batting to put in the middle, and then I hand sewed the pieces together with coordinating thread. I then sewed on felt wings that had the fabric on the back and buttons for the eyes. I used embroidery thread to hang the birds and hearts. At the ends I added cute beads and pearls. The thicker pink ribbon adds the baby girl feel. With the hoops I decided to do the smaller on top with the bigger hoop on the bottom.


Getting the hoops to balance is the hardest part and can take a lot of patience. Luckily my first mobile worked out and looked great in her nursery:


2. Star Mobile for Twinkle Little Star Baby Shower - While shopping for star decorations, I found mini star ornaments in the clearance Christmas section at Target. They inspired me to attempt another baby mobile. I also found a great ribbon there that was gold tinsel with a cotton looking material on it. Reminded me of clouds. I didn't have to sew this time, but tying on all the stars took awhile, especially since I decided to cover three hoops. I used a gold string to hang them and then used the fun gold tinsel ribbon to attach the hoops. I also decided to hang some curled pieces of it hanging off the edges:


Photos via me
They aren't perfect, but I like that about them. They look like they were homemade, which I think makes them unique and full of character. My friend Kelly made one for her first baby using little elephants she had found at World Market. There are tons of items out there to inspire you, so if you are having a baby or needing a special baby gift, a baby mobile is a fun idea.

Here are a couple of my favorites on Pinterest that I would like to attempt some day:

Butterfly Chandelier
Paper Chandelier
Lots of Love,


Sunday, January 26, 2014

Twinkle Little Star Baby Shower!

Ashley and I hosted Anne's baby shower today and it was so much fun! Our "Twinkle Twinkle Little Star" theme turned out great and our food was very tasty. Anne had a great time and got some great presents, plus we all got to socialize and catch-up with our favorite ladies! Overall it was a success and I'm excited to share the pictures with you:

Our invitations that we ordered from Vistaprint. This was the start to our inspiration.

Part decoration for the shower, part baby mobile for the nursery! I will post tomorrow on how to.

Love the sparkle cloths pins I found in the dollar section at Michaels.

Everyone's favorite snack - Nifty Nut House Sixlets!

How amazing is Ashley's diaper wreath! Great alternative to the diaper cake, plus a fun door hanger.

Star balloons from the Dollar Tree were perfect for the occasion! I added a fun ribbon to them for some character.

The lanterns from my wedding were great for adding some height. I purchased these from Z Gallerie.


Used my chalkboard paper and wrote on it with a gold Sharpie marker.

This is the amazingly, addictive popcorn Ashley made. Take kettle popcorn and drizzle melted chocolate and white chocolate on top. Great party snack! 

Loved our table. My mom's gold zebra table cloth worked great and I bought "Twinkle Twinkle" scrapbook paper from Scrap*Funattic.

Ashley also made some delicious chicken salad and we put croissants out so people could make sandwiches.

Grandma's lemon cupcakes were a hit and the star toothpicks looked so cute!


Did the Mary usual of blinging the silverware and I remembered having extra plates from our NYE party - perfect for a star themed party!


Photos via me
The "Twinkle Twinkle Little Star" theme was something different and gave us a chance to add a lot of character to Anne's baby shower. It was so fun to throw a shower for such a good friend and I hope everyone had a good time! Cheers to Anne and Baby Gegen - love ya!

Me, Anne (baby mama!) and Ashley
Lots of Love,

Tuesday, January 21, 2014

Favorite Painting Tips

Staring at our newly painted living room, I decided I should share some of our favorite painting tips that we've learned. That and my cousin's husband was mad at me for not sharing these with him before he tackled their nursery haha!

So here it is, the painting tips list from our house to yours:
  • Wait for a sale to purchase your paint, if you can wait and then stock up on the paint you will need soon. We love taking advantage of the 40% off sales at Sherwin Williams (They currently have 25% off if you are needing paint now).
  • Put a rubber band around the paint can to have something besides the side of the can to scrap your brush.
  • Add the pour helper onto the can of paint, we purchase ours at Sherwin Williams:
Photo via me
  • Make sure you are purchasing the correct roller brush for your wall type. If you have a bumpy/textured wall, you will need a thicker roller brush.
  • If you have a steady hand and feel comfortable, you don't have to put tape everywhere. This is mainly for your ceiling because tape can rip the ceiling - trust me, we learned this the hard way!
  • Our favorite brush for edging and tight areas is the short handled brush:

Sherwin Williams Short Handle Paint Brush


  • Use foil to cover things like door knobs, thermostats, hinges, etc.
  • To paint stripes, this is the best tape to avoid puckering and movement of the tape:

  • When you are done painting for the day, but not done overall, wrap your brushes and rollers with foil to keep them fresh. This avoids the dreaded cleaning every time you want to finish for the day.
  • Plastic floor covers that you can easily move around and reuse seem to be easier to use than the cloth drop cloths. They aren't as expensive and on the cloth, if paint spills it can start to seep through.
Have patience and love your spouse - they are at least trying and practice makes perfect! ;)

Hope this helps cut back a little of the time and frustration that comes along with painting!

Lots of Love,

Monday, January 20, 2014

Silhouette Pictures

Over the past couple years, my favorite baby shower gift has been homemade silhouette pictures. They are perfect because you can customize them to the colors and theme of the nursery. Some are very girly, some neutral and some boyish. Some like elephants, some dogs and some birds. I have done them all and love trying out the different shapes. You can do a single framed picture or double them up. For the Barbie head silhouettes I did for baby Lillie, we made a mix of 6. Turned out very fun!

The keys to a great silhouette picture are the shape and the paper. The shape is important because some things don't look right as a simple silhouette. I once cut out an elephant and when I was done cutting it all out, it looked like an awkward blob because the trunk wrapped up in a weird way. The paper can make or break your project. I like to do a textured solid color on the outside and a fun pattern as the background paper for the silhouette. Make sure the colors coordinate, and make sure they work with the room's color scheme. Looking at the bedding is a good way to capture the color scheme for the room if you are having a hard time.

Here are some of the fun silhouettes I have made in the past:

Very first one! Made for my cousin's baby, Addie. Love the flower print.

Hung up in her cute nursery. Fun to see them added to other fun prints.

Barbie heads created for fancy baby Lillie.


Elephants for my friend's baby Minnie and her elephant themed nursery.

Love how she collaged the wall!

"Tweet Tweets" as baby Lizzie likes to call them.

Cute and girly little nursey!

Girly birds for my friend's adorable baby Lindley.
Pink elephant was needed for little baby Lyla.

For Kelly's future baby (almost here!!!), I made silhouettes of her Lab and German Shepherd. Great way to incorporate your pet into a kid's room!

I like to use the cutout shape for the gift tag.
Photos via me and my fab friends with babies.
After giving my cousin Kelly her fun dog pictures on Saturday, I got some requests from her friends. I decided to start taking orders and eventually will work on getting an Etsy shop setup. For now, if you know someone that would love a silhouette or if you would love one yourself, use the contact form at the bottom of the page (or Facebook message me) and let me know what you are looking for. I can then let you know the pricing (and shipping estimate if you aren't local).

For fun, I decided to raffle off a custom made silhouette picture to one lucky winner! a Rafflecopter giveaway

Lots of Love,